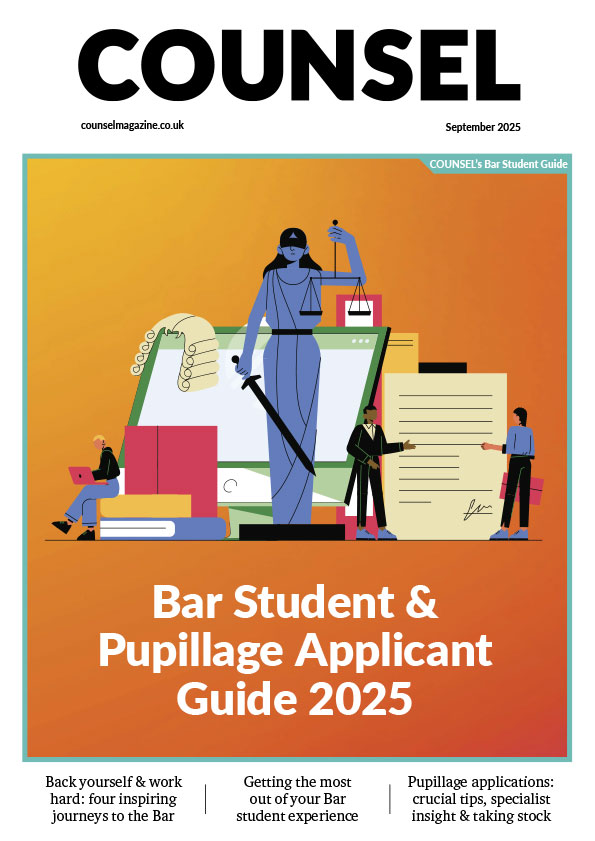
*/
Paperless advocacy has fast become essential for any barrister working in our court system during the pandemic. Part 2 of this two-part series shows you how, step-by-step, to make your e-bundle fully searchable, insert/remove pages, and annotate – using Adobe Acrobat and PDF Expert
By Darren Howe QC, Elizabeth Isaacs QC, Matthew Maynard, Matthew Richardson and Lucy Maxwell
This is the second of two articles providing slimmed-down versions of the skills papers provided at the Family Law Bar Association paperless working seminars on 26 March 2020. In the first part we addressed the steps to be used with Adobe Acrobat Pro DC and PDF Expert version 7 to produce indexed and paginated e-bundles. In this second part of the series we describe how to change your bundle to a fully searchable format, and how to annotate and create summaries of your annotations.
The ‘optical character recognition’ (OCR) function on Adobe Acrobat Pro DC is extremely useful. It changes the documents in your bundle into a format that can be searched by the software.
To convert the bundle:
You cannot work on the file whilst it is running the OCR so it is best done early when receiving the files or e-bundle. You will notice the pages that were photocopied on a slant will be straightened and the text will appear clearer on the screen.
To search the bundle:
NB A basic search can be done by clicking on ‘EDIT and then ‘FIND’ (or cmd + F or Ctrl + F). Type your search terms and it works very much like the equivalent in Word files or an internet browser.
The steps set out in this document in regular text are for PDF Expert on Macbook. The steps set out in bold are for PDF Expert on iPad.
Currently, OCR conversation is not possible on PDF Expert. The lack of ability to do this is one of the biggest drawbacks with PDF Expert.
To search the bundle:
This feature works best on a bundle that has been converted by OCR either by you in Adobe Acrobat Pro DC before sending it to your iPad or by OCR being applied before the e-bundle was sent to you.
Often an e-bundle will be received and marked-up for a hearing and then additional documents or an updated version of the bundle will be received. If you have already annotated the bundle you will want to add the new pages to your existing bundle so that your notes are not lost.
Extracting pages
To remove pages from a new/updated e-bundle:
Inserting pages into an existing bundle
To add pages to an e-bundle:
PDF Expert
Extracting pages/removing pages
To remove pages from a new/updated e-bundle:
OR:
Inserting pages into an existing bundle
To add pages to an e-bundle:
Saving your bundle so it can be accessed on all your devices
We have all had to undertake GDPR certification and should all, by now, be saving our files to a secure cloud-based storage facility. The advantage of using a cloud-based service is that you will be able to access your newly constructed and annotated bundle from any of your devices with access to that cloud.
Highlighting
If you want anything you highlight to be copied and pasted into a comment and the comment list (very useful as we shall see later) you need to ensure your Adobe settings are changed to do this:
To highlight text on a page (this needs to be searchable text ie after you have done the OCR process (above)):
To change the colour of your highlighter:
Making comments
To make a comment (a link to a note you make about a something on the page):
Click on ‘post’ and you comment with appear in the comments list on the right-hand side of the page.
Replying to a comment
Whether the comment is created by highlighting or by entering a note, you can reply to each comment entered into the comment list. To do this:
This function is useful when preparing a case as you can use it to create lists of matters upon which you want to take instructions or challenge in cross-examination. As all your comments are searchable (see below) you can use key words in comments or in replies and then obtain a list of references/pages containing those references. You might use the words ‘CHECK’ if you need to take instructions and ‘CHALLENGE’ if you need to deal with a matter in cross-examination. You can then search the whole bundle and obtain a list of all matters you need to check or challenge – very useful and saves a huge amount of time.
Other annotation tools
The horizontal menu of icons contains a number of other tools you will find useful such as underlining and strikethrough. Again, experiment with each of these tools to see what might be useful for you.
You can access ‘noting-up’ tools via the bar at the top of the page:
Click on ‘annotate’ and the following suite of tools appears:
Highlighting
To highlight text on a page after you have done the OCR process (above):
Making comments
To make a comment (a link to a note you make about a something on the page):
There are many other annotation options in PDF Expert so please experiment.
Adobe Acrobat Pro DC
As described above, making notes that you are able to search is very useful and saves time.
To create different comment lists that are arranged on the basis of the type of annotation:
A new PDF page will appear that has each page marked and the comment made.
To search all of your comments or any sub-list of comments created:
Searching your comments and creating exportable files of the notes you have made saves time when preparing examination of witnesses and submissions. You can create lists of issues to consider for submissions or even re-examination as your client is being cross-examined. If you are smart and consistent in the labels you use for your notes, you will be able to find references extremely quickly.
To create different comment lists that are arranged on the basis of the type of annotation:
To search all your comments or any sub-list of comments created:
Adobe Acrobat (not available on PDF Expert)
It may be that we have the need to amend a document received as a PDF. If adding text or making text alterations this is better done in Microsoft Word than in Adobe.
To convert a PDF to a word document:
Once amended, you can save your document as normal and add whatever security measures you wish:

Darren Howe KC of 1 Crown Office Row specialises in complex child protection cases and private law children disputes. Darren also sits as a Deputy High Court Judge.
Elizabeth Isaacs KC of St Ives Chambers is a family law silk specialising in public and private children law and sits as a Deputy High Court Judge. Liz has been 'paperless' for two years.

Matthew Maynard is a family law specialist practising from St Ives Chambers, Birmingham. He is a family law arbitrator and sits as a Recorder. Matthew has been ‘paperless’ for three years.

Matthew Richardson is a family barrister specialising in financial remedies, and an all-issues family mediator, based at Coram Chambers, London. You can read more from him at his website: richardsonmj.com

Lucy Maxwell of 1GC Family Law practises in all areas of work heard in the Family Court and the Court of Protection.
This is the second of two articles providing slimmed-down versions of the skills papers provided at the Family Law Bar Association paperless working seminars on 26 March 2020. In the first part we addressed the steps to be used with Adobe Acrobat Pro DC and PDF Expert version 7 to produce indexed and paginated e-bundles. In this second part of the series we describe how to change your bundle to a fully searchable format, and how to annotate and create summaries of your annotations.
The ‘optical character recognition’ (OCR) function on Adobe Acrobat Pro DC is extremely useful. It changes the documents in your bundle into a format that can be searched by the software.
To convert the bundle:
You cannot work on the file whilst it is running the OCR so it is best done early when receiving the files or e-bundle. You will notice the pages that were photocopied on a slant will be straightened and the text will appear clearer on the screen.
To search the bundle:
NB A basic search can be done by clicking on ‘EDIT and then ‘FIND’ (or cmd + F or Ctrl + F). Type your search terms and it works very much like the equivalent in Word files or an internet browser.
The steps set out in this document in regular text are for PDF Expert on Macbook. The steps set out in bold are for PDF Expert on iPad.
Currently, OCR conversation is not possible on PDF Expert. The lack of ability to do this is one of the biggest drawbacks with PDF Expert.
To search the bundle:
This feature works best on a bundle that has been converted by OCR either by you in Adobe Acrobat Pro DC before sending it to your iPad or by OCR being applied before the e-bundle was sent to you.
Often an e-bundle will be received and marked-up for a hearing and then additional documents or an updated version of the bundle will be received. If you have already annotated the bundle you will want to add the new pages to your existing bundle so that your notes are not lost.
Extracting pages
To remove pages from a new/updated e-bundle:
Inserting pages into an existing bundle
To add pages to an e-bundle:
PDF Expert
Extracting pages/removing pages
To remove pages from a new/updated e-bundle:
OR:
Inserting pages into an existing bundle
To add pages to an e-bundle:
Saving your bundle so it can be accessed on all your devices
We have all had to undertake GDPR certification and should all, by now, be saving our files to a secure cloud-based storage facility. The advantage of using a cloud-based service is that you will be able to access your newly constructed and annotated bundle from any of your devices with access to that cloud.
Highlighting
If you want anything you highlight to be copied and pasted into a comment and the comment list (very useful as we shall see later) you need to ensure your Adobe settings are changed to do this:
To highlight text on a page (this needs to be searchable text ie after you have done the OCR process (above)):
To change the colour of your highlighter:
Making comments
To make a comment (a link to a note you make about a something on the page):
Click on ‘post’ and you comment with appear in the comments list on the right-hand side of the page.
Replying to a comment
Whether the comment is created by highlighting or by entering a note, you can reply to each comment entered into the comment list. To do this:
This function is useful when preparing a case as you can use it to create lists of matters upon which you want to take instructions or challenge in cross-examination. As all your comments are searchable (see below) you can use key words in comments or in replies and then obtain a list of references/pages containing those references. You might use the words ‘CHECK’ if you need to take instructions and ‘CHALLENGE’ if you need to deal with a matter in cross-examination. You can then search the whole bundle and obtain a list of all matters you need to check or challenge – very useful and saves a huge amount of time.
Other annotation tools
The horizontal menu of icons contains a number of other tools you will find useful such as underlining and strikethrough. Again, experiment with each of these tools to see what might be useful for you.
You can access ‘noting-up’ tools via the bar at the top of the page:
Click on ‘annotate’ and the following suite of tools appears:
Highlighting
To highlight text on a page after you have done the OCR process (above):
Making comments
To make a comment (a link to a note you make about a something on the page):
There are many other annotation options in PDF Expert so please experiment.
Adobe Acrobat Pro DC
As described above, making notes that you are able to search is very useful and saves time.
To create different comment lists that are arranged on the basis of the type of annotation:
A new PDF page will appear that has each page marked and the comment made.
To search all of your comments or any sub-list of comments created:
Searching your comments and creating exportable files of the notes you have made saves time when preparing examination of witnesses and submissions. You can create lists of issues to consider for submissions or even re-examination as your client is being cross-examined. If you are smart and consistent in the labels you use for your notes, you will be able to find references extremely quickly.
To create different comment lists that are arranged on the basis of the type of annotation:
To search all your comments or any sub-list of comments created:
Adobe Acrobat (not available on PDF Expert)
It may be that we have the need to amend a document received as a PDF. If adding text or making text alterations this is better done in Microsoft Word than in Adobe.
To convert a PDF to a word document:
Once amended, you can save your document as normal and add whatever security measures you wish:
Paperless advocacy has fast become essential for any barrister working in our court system during the pandemic. Part 2 of this two-part series shows you how, step-by-step, to make your e-bundle fully searchable, insert/remove pages, and annotate – using Adobe Acrobat and PDF Expert
By Darren Howe QC, Elizabeth Isaacs QC, Matthew Maynard, Matthew Richardson and Lucy Maxwell

The age of criminal responsibility, extreme weather and conflict resolution – plus, new protocol for reporting bullying at the Bar
By David Green
Mário Barroso, Head of R&D and Method Development at AlphaBiolabs, examines the forensic science underpinning hair drug testing, its evidential scope and limitations, and why it remains the gold standard for evidencing patterns of drug use in family proceedings
Unlocking your aged debt to fund your tax in one easy step. By Philip N Bristow
Clement Cowley, Partner at The Penny Group, discusses the upcoming changes to pensions and Inheritance Tax and the potential impact on your financial future
Save the Children UK is the latest charity to benefit from a £500 donation from AlphaBiolabs via the company’s Giving Back initiative
Barrister apprenticeships – shortly to provide the fourth pathway to the Bar – are an ideal opportunity to support local talent and ‘grow your own’, say Tim Coulson and Dr Jane Dennehy
Solicitor General Ellie Reeves KC MP discusses her decade as a trade union and employment law barrister, the demands of life as a Law Officer and the number one priority shaping her work. Interview by Anthony Inglese CB
A decade of reviews and research has disrupted accepted thinking in the search for causality. Suicides following abuse have overtaken domestic homicides. Is the law keeping up? Professor Susan Edwards KC (Hon) examines recent cases and the obstacles to successful prosecution
Why every major sporting event needs an anti-corruption policy. By Louis Weston
At least not that way, says Richard Paige